
Hazelcast có thể được ứng dụng trong rất nhiều trường hợp: dùng làm cache, dùng bắn event giữa các service, dùng làm kho chứa dữ liệu,….
Bài này mình sẽ hướng dẫn các bạn cách để cấu hình và code xử lý demo gửi nhận tin nhắn thông qua hazelcast. Let’ go
Dựng hazelcast server
Bạn cần cài đặt được hazelcast server để lấy thông tin kết nối bao gồm: username, password, host kết nối. Cách cài đặt thì bạn có thể cài trên một máy local, cài trên docker hoặc cài trên server Centos 7
Dựng project và cấu hình thông tin
Khởi tạo một dự án spring boot bằng spring initializr, trong file pom.xml nhúng thư viện của hazelcast
        <dependency>
            <groupId>com.hazelcast</groupId
            <artifactId>hazelcast-client</artifactId>
            <version>3.9</version>
        </dependency>


        <dependency>
            <groupId>com.hazelcast</groupId>
            <artifactId>hazelcast</artifactId>
            <version>3.9</version>
        </dependency>
lấy thông tin kết nối hazelcast server ở bước 1 và đưa vào file application.properties
hazelcast.address={host_address}:1234
hazelcast.group_name={group_name}
hazelcast.group_password={group_password}
tạo file config cho hazelcast
import com.hazelcast.client.HazelcastClient;
import com.hazelcast.client.config.ClientConfig;
import com.hazelcast.core.HazelcastInstance;
import org.springframework.beans.factory.annotation.Value;
import org.springframework.context.annotation.Bean;
import org.springframework.context.annotation.Configuration;

@Configuration
public class HazelCastConfig {

    @Value("#{'${hazelcast.address}'.split(',')}")
    protected String[] address;

    @Value("${hazelcast.group_name}")
    private String groupName;

    @Value("${hazelcast.group_password}")
    private String groupPassword;

    @Bean(name = "hazelcastClient")
    public HazelcastInstance hazelcastClient() {
        ClientConfig clientConfig = new ClientConfig();
        clientConfig.getGroupConfig().setName(groupName).setPassword(groupPassword);
        clientConfig.getNetworkConfig().addAddress(address);
        clientConfig.getNetworkConfig().setConnectionTimeout(10000);
        clientConfig.getNetworkConfig().setConnectionAttemptLimit(0);
        clientConfig.getNetworkConfig().setConnectionAttemptPeriod(50000);
        return HazelcastClient.newHazelcastClient(clientConfig);
    }

}
khởi chạy ứng dụng để kiểm tra kết nối từ app client tới hazelcast server
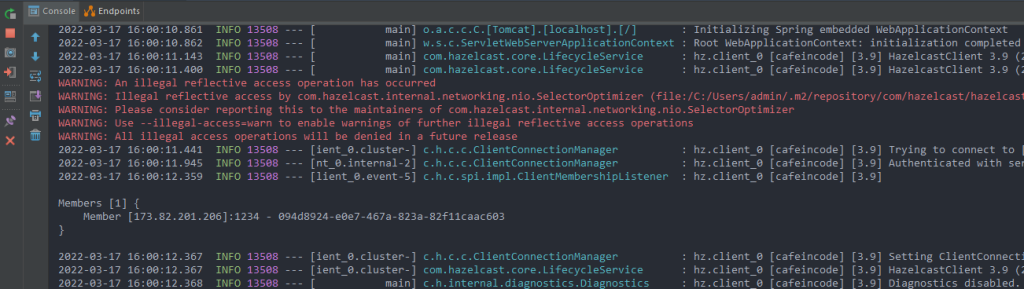
vậy là kết nối thành công, bây giờ chúng ta sẽ code xử lý việc gửi nhận tin với hazelcast thông qua Topic, thực hiện các bước sau:
Tạo một listener để lắng nghe tin nhắn từ Topic
@Slf4j
public class PubSubListener {

    private HazelcastInstance hazelcastClient = (HazelcastInstance) AppContext.getBean("hazelcastClient");

    public PubSubListener() {
        String topicName = "cafeincodeTopic";
        ITopic<String> topic = hazelcastClient.getTopic(topicName);
        topic.addMessageListener(new TestPubSubListenerImpl());
    }

    public class TestPubSubListenerImpl implements MessageListener<String> {
        @Override
        public void onMessage(Message<String> message) {
            log.info("-------------------Start consumer message from topic -------------------");
            String messageValue = message.getMessageObject();
            log.info("-------------------End consumer message from topic:{}", messageValue);

        }
    }
}
Tạo một bean để khi ứng dụng khởi chạy thì bean listener sẽ được khởi tạo
@Configuration
public class BeanConfig {

    @Bean(name = "pubSubListener")
    public PubSubListener pubSubListener() {
        return new PubSubListener();
    }
}
Viết một Rest controller để test việc đẩy tin nhắn vào Topic
@RestController
public class TestRestController {


    @Autowired
    private HazelcastInstance hazelcastClient;

    @GetMapping(value = "/send-message")
    public String sendSMSToHazelcast() {
        String topicName = "cafeincodeTopic";
        String message = "Sending message to Hazelcast topic by hungtv:" + new Random().nextInt(100);
        System.out.println("----------------PUBLIC MESSAGE TO TOPIC:" + message);
        ITopic<String> topic = hazelcastClient.getTopic(topicName);
        topic.publish(message);
        System.out.println("----------------END PUBLIC-------------");
        return "OK";
    }
}
Khởi chạy ứng dụng và kiểm tra việc truyền nhận dữ liệu
gõ vào trình duyệt đường dẫn http://localhost:8088/send-message để kiểm tra

Vậy là xong phần hướng dẫn cách build một hệ thống pub-sub đơn giản dùng Topic, các bài sau mình sẽ hướng dẫn thêm về cách sử dụng trong các trường hợp về cache, database,….
Xem thêm các bài hướng dẫn liên quan dưới đây:
- Hazelcast Distributed Cache with Spring Boot
- Hazelcast là gì, cùng nhau tìm hiểu một chút
- Cài đặt Hazelcast trên server Centos 7
- Build hệ thống Pub Sub dùng Hazelcast và Spring boot
- Elasticsearch là gì mà bá đạo đến vậy? [Phần 1]
- Elasticsearch và Kibana dựng bằng Docker
- Series tìm hiểu lập trình java
- Cùng nhau tìm hiểu Docker
- Active Jrebel để code trong IntellIJ IDEA
- Lập trình viên lúc rảnh rỗi thì nên làm gì?
- Câu chuyện phỏng vấn online mùa Covid
- Nói sao để được chào đón, làm thế nào để được ghi nhận
- 13 Plugin không thể thiếu khi làm việc với IntellIJ IDEA
- Những plugins Intellij IDEA tốt nhất trong công việc
- Crack Intellij IDEA new versions 2021
- Crack IntellIJ để code như một senior
- Shortcut Intellij hữu ích để làm việc được hiệu quả hơn
- Build hệ thống Pub-Sub bằng Kafka+Spring boot (phần 3)
- Git stash giúp bạn trở nên chuyên nghiệp như thế nào?
- Git revert với git reset hoạt động như thế nào
- Tìm hiểu cơ chế hoạt động của Apache Kafka (phần 1)
- Tìm hiểu cơ chế hoạt động của Apache Kafka (phần 2)